
If term is hell Auto Generate Short URL. If you saw, in each of the bottom of this blog post title there is a fairly short URL. The URL is a "shortcut" to get to this blog post. That is called the short URL. For example, you have a post which is located in http://www.domain.com/2016/07/ini-longurl.html, when the use of short URLs, addresses turn into http://goo.gl/xyz.
Why should use short URLs from Google? Well, his name is also Google. If Google already provides, why use anything else? LOL kidding, only taste. If you want to use bit.ly, tinyurl, or others may also.
The difference, short URL in this blog automatically generate most. I do not ever intentionally shorten any URL to http://goo.gl . He really will be created automatically when a new post is made. Passable save time, right? Make your Life Easier.

Actually, you can make use your own URL shortener, domain.com/mUyhz example. But I do not discuss it, so that bloggers who do not use their own domain name can try.
Any kind of excess wear short automatic URL?
- Post address easier to remember.
- Easy copy-paste, so more shareable.
- Looks more simple.
- What is certain is automatic, need not be complicated to shorten itself.
Okay, go straight to the tutorial yes.
First: Get Google Shortener API Key
- Go to the Google API Library. Make sure you have a Google account yes. Then clickCredentials.

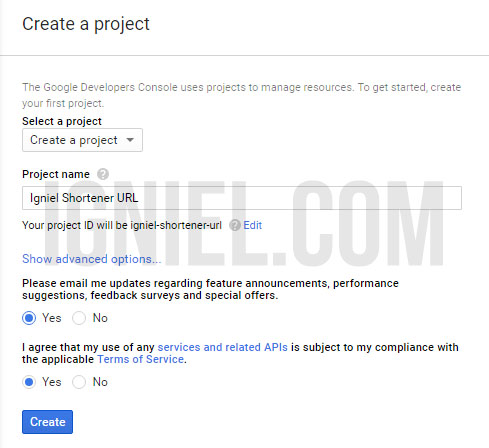
- Create project forms appear. Fill as desired.Then click the Create button.
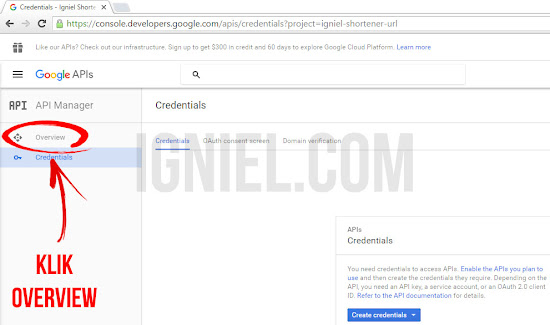
- Click Overview.
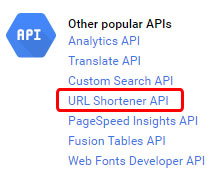
- Look in the "Other popular APIs". ClickURL Shortener API.
- Click Enable.

- Afterwards, there will be writing "This API is enabled, but you can not use it in your project until you create the credentials. Click" Go to Credentials "to do this now (strongly recommended)."Just click buttons.

- Fill like this:
- Which API are you using? Select theURL Shortener API.
- Where will you be calling the API form? Select Web browser (Javascript).
- What will you be Accessing Data?Select Public data.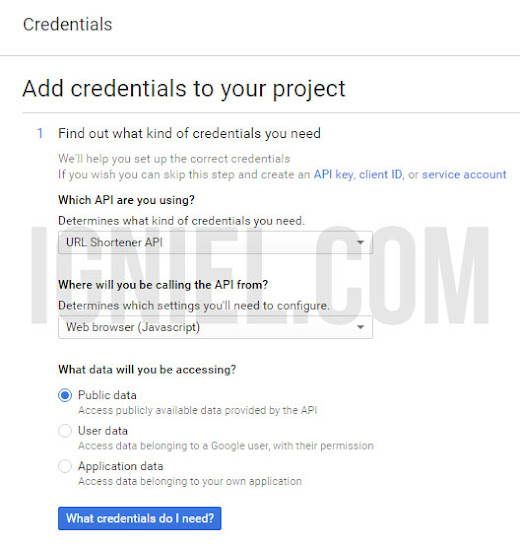
- Appeared in another form. Fill like this:
- Name. Write as you wish.
- Accept requests from Reviews These HTTP referrers (web sites). Fill in the address of your blog.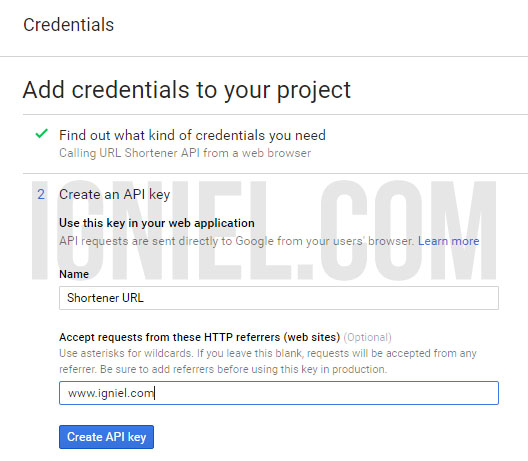
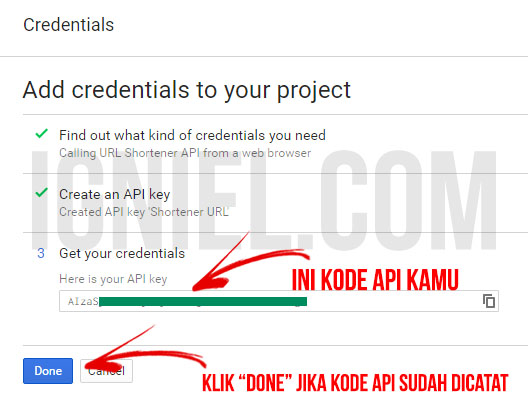
- Appeared in another form signifies the manufacture of API success! Please note the API code ya. If so, click the Donebutton.
Second: Setting By Blogger
- Save this CSS code before
]]></b:skin>or</style>. Note, this style is used in Igniel blog. You can change as you wish..shorten-box {float:right; font-size:15px;padding: 5px 6px;background: #008c5f;color:#fff;border: 1px solid;border-radius: 3px;border-radius:3px;} .shorten-text {display:inline-block;position: relative;margin-right:8px;} #output{display:inline-block;} .output{display:inline-block;monospace;white-space:initial;word-spacing:normal;word-break:normal;hyphens:none;color:#000;cursor:pointer;background:#fff;border-radius:3px;line-height:1;padding:2px 5px;margin:0;box-shadow: inset 0px 0px 1px rgba(0,0,0,.0.8); } .output:focus,.output:active{outline:none} - Save the output code, aka where your short URL. Actually it could be put anywhere, origin is still in the body column posts. I demonstrated, the output will be stored under the posts.
- Find the code<b:includable id='post' var='post'>
- Scroll down, find this code or something similar like this.<data:post.body/>
<data:post.body/>
<div style='clear: both;'/> <!-- clear for photos floats -->
</div>
- Keep this code below</div><b:if cond='data:blog.pageType == "item"'> <div class='shorten-box'> <input expr:value='data:post.url' id='longurl' name='url' type='hidden'/> <div class='shorten-text'>Short URL:</div> <div id='output'/> <div class='clear'/> </div> </b:if> - Save this code before the
</body>. Replace XXXKODEAPIXXX code with your own API key.<b:if cond='data:blog.pageType == "item"'> <script> //<![CDATA[ (function() { var po = document.createElement('script'); po.type = 'text/javascript'; po.async = true; po.src = 'https://apis.google.com/js/client.js'; var s = document.getElementsByTagName('script')[0]; s.parentNode.insertBefore(po, s); })(); function makeShort() { var longUrl = document.getElementById("longurl").value; var request = gapi.client.urlshortener.url.insert({ 'resource': { 'longUrl': longUrl } }); request.execute(function(response) { if (response.id != null) { str = ""; str += "<div class='output' contenteditable='true' onClick='document.execCommand("selectAll",false,null)' title='Click and CTRL+C'>" + response.id + "</div>"; document.getElementById("output").innerHTML = str; } else { alert("ERROR: creating short url n" + response.error); } }); } function load() { gapi.client.setApiKey('XXXKODEAPIXXX'); gapi.client.load('urlshortener', 'v1', function() { document.getElementById("output").innerHTML = makeShort(); }); } window.onload = load; //]]> </script> </b:if> - Lastly, do not forget to Save Template.
Done. Now you need lazy tricks shorten the URL for each post because he will automatically generate most.